Always carry your Gas Mask!

Posted on by

The threat of gas warfare played a major role in the First World War in Europe, meaning that in 1939 a lot of Great War veterans carried the memories of the horrors of a gas attack, with some still having health issues from suffering gas attacks in battle. Some men were blinded by gas, while countless more suffered breathing and other health issues throughout their lives. The fear of gas attacks hung heavy on the British public consciousness, and with the beginning of Nazi bombings in London bringing the civilian population directly into war, the British government considered the threat of gas attacks to the civilian populations of London and other cities to be imminent.

Bombings of cities brought the reality of the dangers that Nazi bombers could present to Londoners and residents of other cities. With the fear of the release of gas and other chemical agents, life in Britain could be severely curtailed.

To prepare for this crisis, the British government decided to issue every man, woman and child their own personal respirator – or gas mask – for protection against such chemical attacks. The manufacture of these masks was going to be expensive, as masks had to be made for the armed forces, be required for civilian services like the ARP and Fire Service, and produce close to another 38 million masks for civilians. The contract was given to a factory in Lancashire, and production started in 1938, when the early threat of war was realized due to the German occupations of Austria and the Sudetenland.

While the masks were being produced, the government issued training to members of the various civil defense organizations in procedures for dealing with gas casualties. Air Raid Wardens would use rattles to sound in the event of gas being detected or suspected. Some public swimming pools had the men’s and women’s dressing rooms refitted as gas or chemical attack decontamination facilities.

Homeowners were advised to seal their windows shut as an anti-gas sealant measure, while mailboxes and telephone booths were painted with red paint that would change color to green with exposure to gas. Private firms started to manufacture gas masks for pets and horses, with attempts being made to manufacture less scary masks for children and babies.

Gas masks were designed for children

With the outbreak of war in September 1939, gas masks were issued to the public in cardboard boxes with strict instructions that they be carried at all times, without exception. Fines would be imposed on civilians if they were caught without their gas mask. The public eventually replaced their cardboard boxes with other available alternatives, as the government-issued gas mask boxes that were made of cardboard were prone to falling apart and were cumbersome to use.

Although the government invested in respiration products with diligent planning, luckily gas was never used as warfare against British civilians.

The Government issued warning signs to always carry a gas mask!

Category: Uncategorized

Canning and Preserving in Wartime

Posted on by

https://amzn.to/49tmKzL

Shop canning jars at Amazon 

These were the days before refrigeration and freezing was common in household kitchens (and not just Britain — the refrigerator revolution did not sweep America until the late 1940s), so housewives still knew and used preservation techniques such as canning. The Ministry of Food educated people with leaflets, radio programmes and community demonstrations on the latest and greatest food preserving techniques, to ensure that no food went to waste.

Eggs could be kept fresher for a bit longer by rubbing them with lard to seal the pores, or for longer periods, by storing them in crocks under water with isinglass or waterglass mixed in, or by turning them into pickled eggs.

Canadian Women’s Institutes supported their sister British Women’s Institutes, by donating to them useful tools such as canning machines, etc, which could be shared out.

Preserving of fruits and vegetables was largely done in Kilner jars: glass jars with glass lids with a spring on them. You put a rubber ring around the neck of each jar before sealing it. You replaced the rubber rings each season.

Members of a Women’s Institute enjoying a tea break during a canning session at Ashton-under-Edge village hall (Photo by Kurt Hutton/Picture Post/Getty Images)

Even if you grew your own fruit, making jams and preserves from it was tricky as sugar was rationed and you weren’t likely to be able to get enough sugar, unless you had some food item you could swap with someone else for their sugar. Many people started saving up their sugar rations right at the start of the summer to help with canning time.(Some years, during the summer, the Ministry of Food was able to double the sugar rations to encourage home preserving.)

The Ministry of Food also advised people on how to cure and preserve meat. Pork or lamp chops could be preserved for up to six weeks by first cooking them, and then putting them in a crock completely covered with fat.- from cooksinfo.com

(c) Dr R. W. Follet; Supplied by The Public Catalogue Foundation
Category: Uncategorized

Put Your Best Face Forward!

Posted on by

44ponds

It was a lot of work to stay beautiful in wartime. Food, fuel, and clothing weren’t the only things rationed. Beauty was, too (actually the tools to keep beautiful were rationed). Hair care, face, and beauty products contained many ingredients that were rationed, so it took some creativity for the wartime woman to look for alternatives to keep up a beauty regimen.

Hair

Keeping hair clean was a struggle. Working in factories, rationed shampoo, and limited water usage made it hard work to keep hair clean and beautiful. One method that women in wartime Britain used to wash hair was to mix a tablespoon of baking powder with a small cup of warm water or to saturate hair in vegetable oil (when available) and wrap in a towel until ready to wash. Dry hair was made shiny and manageable by rinsing in beer.  Lemon juice was used (when one could find lemons due to rationing) on hair which helped to remove residue from hair. Not only was a homemade regimen practical, but using every day items that were readily available showed women were supporting the war effort. Magazines targeted women by using slogans such as  “Put Your Best Face Forward.” An active beauty regimen also helped at a time when black outs required finding something to occupy time spent in the dark!  Setting hair at night took some creativity.  One of the most popular methods was to curl hair by “ragging.”  Curls were achieved by tearing old material into strips, taking a small section of hair and twist around the rag until the twist reached the scalp, and then tie the ends of the rag together, and go to bed. One would wake up to curly hair!

Cosmetics

Heavy brows were the thing for women in wartime. Cosmetic counters today are adorned with countless numbers of beauty products offering every eye preparation imaginable, with the most daring item in the WW2 woman’s make-up bag for eyes was charcoal. Eyebrows were often completely shaved off; then a charcoal pencil being used to draw on to create a full-brow affect.

Olive oil or petroleum jelly was applied on top to make the brows shine. During the daytime, women would use the petroleum jelly on their eyelids to act as an eye shadow. This brightened up the eyes and was easy for women working in the factories.

Mascara was not widely used during wartime. Women would make it from petroleum jelly and coal dust pressed together to then be applied to the lashes with a fine brush.

Face powder was used and was essential as it doubled up as a tool to create a matte base if going out after working in the factory. Beetroot was used as a lipstick and a rouge.

Lips

As previously mentioned, lipstick was used and the war-time colour was, without any doubt, red. Using beetroot and cherry juice achieved this effect. The favourite color was red, and the patriotic shade enabled women to show their support for the war effort and it made them feel more confident (it also went down well with the soldiers!)

Churchill engendered a notion of fighting the enemy by keeping up morale with beauty and looking one’s best. Magazines and newspapers had an endless flow of hints and tips for scrimping and making powders and lipsticks last longer. Beauty was propagated as a way of lifting the wearer from the awful reality of war, not just for herself, but for her soldier too.

Shhh…other beauty tips

There were all sorts of other beauty secrets women of the war possessed. From removing vegetable stains on their hands with lemon juice, to oiling themselves up to tan!

American forces introduced British home front women to nylons which enabled them to create stockings and suspenders. As nylons became increasingly necessary for the war effort, women were forced to resort to other alternatives. In order to get the much sought-after sophisticated  stocking look, women would paint their legs with gravy browning and draw a line down the backs of their legs with charcoal to create the effect of the seams.

Another method similar to this was by taking four or five teabags, soaking them in warm water and then applying this mixture to legs to give the effect of wearing stockings.

Despite living on rations, some women put beauty before their appetite and used a mixture of rationed sugar and a little warm water or lemon juice to act as a skin exfoliator.

Working all day in a factory was never good for their hands so women would take some petroleum jelly with them to work to apply before going home. This kept their hands soft and supple.

What natural products do you use to stay beautiful during wartime?

Category: Uncategorized

Mock Sausage

Posted on by

With meat being rationed, many “mock meat” recipes were created to satisfy the desire for meat, but using ingredients that weren’t rationed.

This “mock sausage” recipe tastes quite good, and it can be made vegan

Ingredients

  • 1 cup quick rolled oats
  • 2 teaspoons poultry seasoning or use a mix of 1/2 teaspoon sage, 1/2 teaspoon thyme and a 1/2 teaspoon rosemary
  • 1 teaspoon paprika
  • 1 teaspoon fennel seeds, crushed
  • 1 teaspoon onion powder
  • 1 teaspoon garlic powder
  • 1 teaspoons parsley flakes or more to taste
  • 1 teaspoon salt
  • 1/2 teaspoon black pepper
  • 2 eggs (remember eggs were rationed!) or 3 egg whites or 6 tablespoons bean water, as from cooking chickpeas
  • 2 cups water
  • 1 boullion cube or 2 teaspoons soy sauce

Instructions

  1. In a medium bowl combine oats with eggs or bean water, poultry seasoning (or sage, thyme, rosemary), crushed fennel seeds, paprika, onion powder, garlic powder, parsley flakes, salt, and pepper. Move aside.
  2. In a medium saucepan, bring the water to a boil. Add a bouillon cube or soy sauce. Remove from heat and move aside.
  3. Form oat mixture into 4 “sausage” patties. In a medium frying pan, heat 3 tablespoons oil or fat on medium heat and fry patties until golden; about 1-2 minutes on each side.
  4. Reduce heat and add hot stock. Allow the cooked patties to come to a boil then reduce to a simmer. Cover and allow to cook for about 20 minutes
  5. Pour off the stock and save for gravy! Return frying pan to medium heat and add a little more oil or fat. Fry the patties a second time, again for a minute or two on each side until desired brownness. Remove from heat and serve with jacket potatoes or carrots for a wartime dinner.

Category: Recipes, Uncategorized

Potato Cutlets

Posted on by

Scrub 1 1/2 pound potatoes and scrape 1/2 pound of carrots. Boil together until tender. When cooked, peel potatoes and mash with carrots. Add 3 tablespoons flour, 1 teaspoon chutney, and chopped parsley. Shape into cutlets and pan fry on both sides until brown in a very little fat. Save your water from the cooked vegetables for use in soup or stew!


Category: Recipes

The Powerful Potato

Posted on by

The common potato became a key ingredient and a staple of the average diet during Wartime in Britain. Potatoes were easy to grow and abundant in the United Kingdom. Potatoes were also filling and were marketed as an energy food. “Potatoes help to protect you from illness,” said a leaflet on potatoes issued by the Ministry of Food. “Potatoes give you warmth and energy. Potatoes are cheap and home-produced. So why stop at serving them once a day? Have them twice, or even three times — for breakfast, dinner and supper.

P’s for Protection Potatoes afford;
O’s for the Ounces of Energy stored;
T’s for the Tasty, and Vitamins rich in;
A’s for the Art to be learnt in the Kitchen.
T’s for Transport we need not demand;
O’s for old England’s Own Food from the Land;
E’s for the Energy eaten by you;
S’s for the Spuds which will carry us through!

Potatoes plants were found in every Victory Garden. Potatoes were even planted on the tops of Anderson shelters; garden pamphlets encouraged everyone to use any plot of land to which they had access; digging up flower gardens to using backyard plots and even window containers to grow vegetable and herb gardens. Leeks, turnips, cabbage, lettuce, and swedes were popular as seeds were initially and readily available and grew well in British soil.

14 Oct 1943, Finnamore Camp, Buckinghamshire, England, UK — The girls of Beal County School evacuated from Ilford to Finnamore Camp, Buckinghamshire, are helping farmers in the district to harvest their potatoes. The girls do two hours a day while the crop lasts. — Image by © Hulton-Deutsch Collection/CORBIS
Potato Pete
The Ministry of Food issued pamphlets with information on preparing and preserving food.

Category: Uncategorized

Knitting on the Ration

Posted on by

During the war in a Britain, knitting by hand reached its peak. Women, and a few men, were encouraged to contribute to the war effort by knitting. It was considered one’s duty to knit socks, hats, and other items for the troops serving throughout the Empire. The motto was: “England expects – knit your bit.”

BF3D12C2-2B27-4731-8DDB-76634B95BE9C

Manufacturers gave away free knitting patterns and knitting wool was given to schools so that children could knit gloves, scarves, balaclava “helmets,” (a balaclava was a knitted covering designed to keep the neck and head warm, with just an opening for the face, and worn under a helmet) and knitted hats for the forces. Wool was also supplied to local WIs (Women’s Institutes of Great Britain), who made over 22 million knitted garments for the Red Cross (an average of 67 garments per member). Items knitted were sent to prisoners of war, as well as to troops overseas.

The warmth of the knitted garments also made them popular for those on the home front, who were faced with a shortage of heating fuel and needed to keep warm during wartime winters. In the face of wool rationing, knitters were encouraged to unravel old sweaters and other woolen garments to make new ones. Waste not, Want not!


Below are pattern instructions for the Balaclava helmet. Knit your own and stay warm!

28D7AB41-4D31-480B-9E05-28CBEE85374DD8925EBE-4946-4BD2-B264-52C7E37B518E

The Balaclava Helmet
Materials
2 oz. of Jaeger “Super-Spun” (“,J.S.” Quality) Fingering, 4 -ply, (9d. per oz.), 1 pair of No. 10 Jaeger knitting needles, and 1 set of No. 11 Jaeger knitting needles with points at both ends.
Measurements Length, 16 inches.
Tension
15 stitches to 2 inches in width, and 15 rows to 2 inches in depth, measured over the garter-stitch.
Abbreviations
K. = knit; p. = purl; sts. = stitches; tog. = together; inc. = increase or increasing; dec. = decrease or decreasing.
Casting-on
If you cast on with two needles work into the back of all cast on sts. to produce firm edges, but if you use the thumb method this is not necessary.
The front flap
Begin at the lower edge. Cast on 30 sts. using No. 10 needles and work in garter-st., inc. 1 st. at both ends of every row until there are 50 sts. on the needle. Continue without inc. until the work measures 6 inches from the beginning.
Next row – Cast on 8 sts., k. to end. Leave this work for the present and work the back flap in the same way. Now place the sts. of the back and front on to three No. 11 needles, then with the fourth needle work in k.2, p.2 rib until the work measures 9.5 inches from the beginning. Now place the centre 32 sts. of the front on to a spare needle. Change to No. 10 needles and garter-st. and continue on the remaining 84 sts. for 0.5 inch.

Next row – K.10, turn and work 2.5 inches on these sts. Cut the wool.
Next row – K.64, turn and work 2.5 inches on these sts. Cut the wool. Work on the remaining 10 sts. for 2.5 inches.
Next row – K. across all sts. Continue on these sts. for 2 inches. Now shape the top as follows: 1st row – K.53, k.2 tog., turn.
2nd row – K.24, k.2 tog. Rep. the 2nd row until all sts. are on one needle and 24 sts. remain. Now using No. 11 needles pick up and k.36 sts. down the left side of head, work in k.2, p.2 rib across the 32 sts. of the chin, pick up and k.36 sts. along the right side of the head, then rib the 24 sts. at the top of the head (128 sts.). Arrange these sts. on three needles and with the fourth needle work 2 inches in k.2, p.2 rib. Cast off in rib.

The ear flaps
Holding the work right side towards you, pick up and k.28 sts. along the front ear opening. Work 2 inches in garter-st. on these sts., then dec. 1 st. at both ends of every row until 12 sts. remain. Cast off. Press the work on the wrong side with a warm iron and damp cloth.


Category: Uncategorized

Evansville in World War II

Posted on by

Wartime in Evansville

Although this website is devoted to Britain in wartime, the war effort was global. Rationing and war production in the United States helped Britain fend off the Nazi war machine while providing a booming wartime economy in many cities like Evansville, Indiana. I highly recommend reading James L. MacLeod’s book, Evansville in World War II.

During World War II, the city of Evansville manufactured vast amounts of armaments that were vital to the Allied victory. The Evansville Ordnance Plant made 96 percent of all .45-caliber ammunition used in the war, while the Republic Aviation Plant produced more than 6,500 P-47 Thunderbolts—almost half of all P-47s built during the war. At its peak, the local shipyard employed upward of eighteen thousand men and women who forged 167 of the iconic Landing Ship Tank vessels. In this captivating and fast-paced account, University of Evansville historian James Lachlan MacLeod reveals the enormous influence these wartime industries had on the social, economic and cultural life of the city.-from The History Press/Arcadia Publishing website:

www.Arcadiapublishing.com/Products/9781626196759

IMG_1127

Category: Uncategorized

Green Vegetables in Wartime

Posted on by

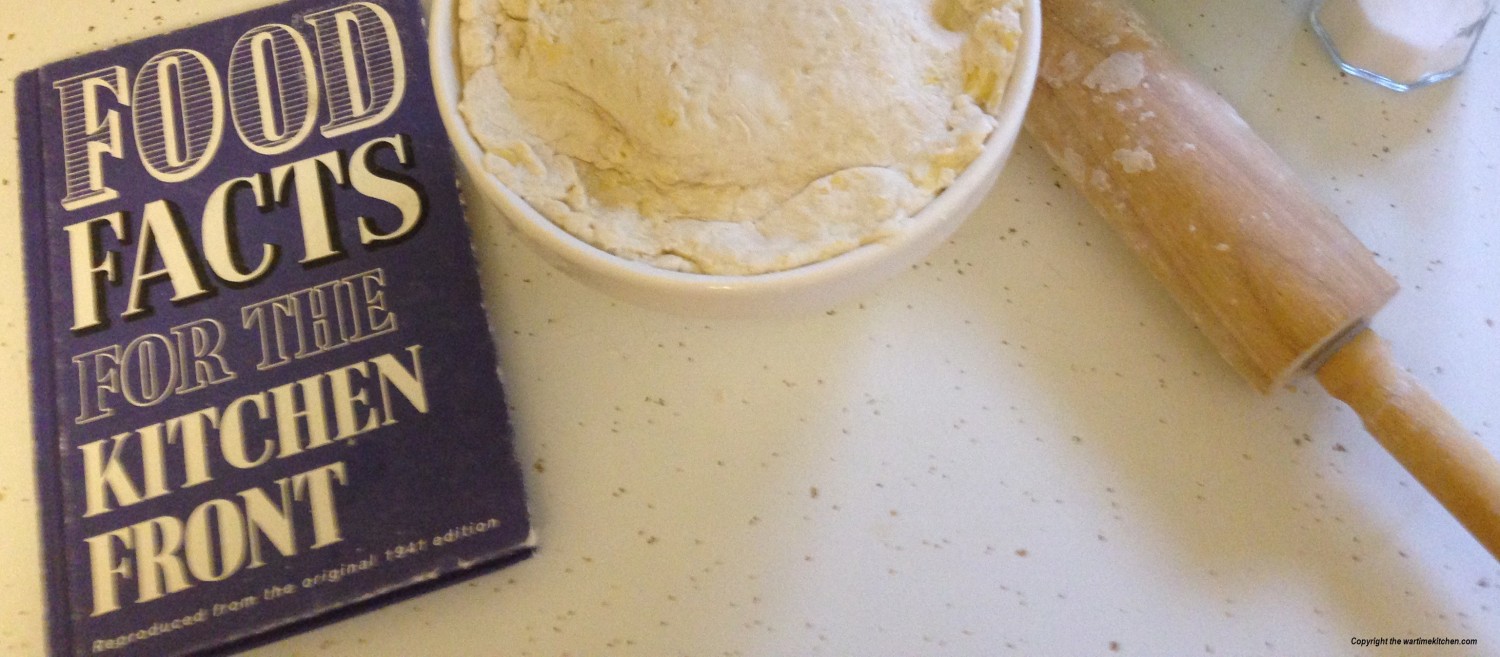
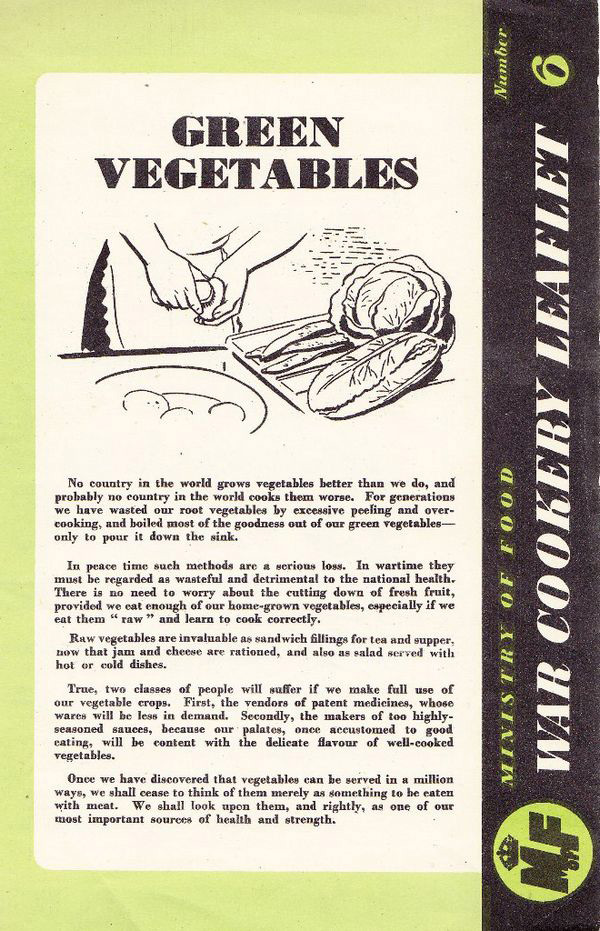
Since vegetables were an important part of the wartime diet, the Ministry of Food issued the “Green Vegetables” leaflet on 18 June 1940. Since nothing went to waste, hints were included on preparing leaves and tops of vegetables.

IMG_1125
How to Cook Green Vegetables

If you have a garden don’t cut youur vegetables until you actually need them. Much food value is lost if the are left in the rack to get stale. It is wrong to soak green or root vegetables for a long time before cooking, as this wastes valuable mineral salts and vitamins. Wash them thoroughly, and, if tight-hearted, soak in salted water for not more than ½ hour.

If the outside leaves are really too tough to serve, save them for soups and stews. These dark green outside leaves have more food value then the centre.

Green vegetables must be cooked as quickly as possible as slow cooking destroys much of the vitamin, so follow these rules:-

Shred them-that is, slice them with a knife. Shred cabbages, spring greens, turnip tops, nettles, Brussel tops, even Brussel sprouts if they are large. In short, shred any green vegetable except spinach which cooks so quickly that it does not need it. Divide cauliflowers into sprigs so that they will cook more quickly.
Never drown green vegetables. You need only just enough water to keep your pan from burning-usually a teacupful will do.
Bring the water to the boil, add a little salt and sprinkle the green into the boiling water. Less salt is needed than the old-fashioned way of cooking greens, because by this method you keep in nearly all the natural salts of the vegetables.
Cook with the lid on the pan. This is important because you are going to “steam boil” the greens, and if you let the steam escape the pan may go dry.
Boil briskly for 10-15 minutes. If you can spare the time, give the pan a shake or two during that time.
Drain off any liquid from the pan and save it for gravy or soup. If you can spare a teaspoon of margarine, add it to the vegetabbles and toss well before serving. Serve at once.
If you follow these suggestions you will find that the greens are quite cooked, but crisp and full of flavour.

Tops

Broccoli tops, turnip tops and beetroot tops, have good food value and are all excellent if cooked as described above.

Cabbage with Variations

All sorts of additions can be made to cabbage as described above. A few bacon rinds chopped small: a few teaspoons of vinager and a sprinkle of nutmeg, or perhaps a shake of caraway seeds, and you have something quite new and intriguing.

Cabbage with Horseradish Sauce

Shred 2 lbs of cabbage and cook as describe. Drain and use the liquid for the following sauce:

Melt 1 oz fat in a pan, stir in 1 oz flour and cook together for 2 or 3 minutes. Then add gradually 1 teacupful vegetable water and milk (half and half if possible) stirring all the time.

Put the cabbage in a heated dish, pour the sauce over it and serve.

Spinach

Wash the spinach very throughly. Shake and put in a pan without water; sprinkle a little salt, put on the lid and cook gently until tender (about 10 minutes). Drain and serve or, if preferred, the spinach may be chopped, and a little margarine and pepper added.

Peas

When boiling fresh garden peas put a teaspoonful of sugar, if possible, and a little salt in the water as well as the mint, and be careful not to cook them too long or too fast, or they will come out of their skins. If you are cooking another vegetable, peas are delicious cooked in a steamer on the top. Sprinkle with a pince of salt and put a sprig of mint with them in the steamer. Save the water for soup and gravy.

Pea Pods

Pea pods provide a delicious dish if the clear-skinned, fleshy pods are used like this. Divide each pod into two. Hold one of the sections in your left hand, stalk end uppermost and inside towards you. Snap down about ½ inch of the pod of the stalk end towards you. Then, holding firmly, pull downwards, stripping the inside skin from the outer. With a little pratice, this is easy. Cook the fleshy outsides in very little salted water until tender (about 10 minutes), drain and serve.

Pea pods also make an excellent stock for soup.

French or Runner Beans

When young, cook whole with only the tops and tails removed. When older, the stringy vein which develops along the rib of the pod must be removed.

Most housewives like to slice the beans lengthwise. But it is a great saving in time to break them with the fingers into 2-in. lengths, and less flavour is lost this way.

Boil until tender in a very small amount of salted water. If you like your beans to glisten, add a teaspoonful of fat to the water.

Be sure to save the water. It is good as a drink by itself; or use it for gravy or soup

Broad Bean Tops and Broad Beans

The tops of broad beans, which gardeners always pick off, make a delightful dish if cooked as a green vegetable

When young, broad beans can be cooked, unshelled, in a little salted water, and eaten pod and all. Or the beans can be shelled and the pods sliced. The cooked sliced pods are very good as a hot vegetable or served coldd in a salad.

When the beans are older the pods are too tough to eat as a vegetable, but make good stock for soups.

Broad beans which have been allowed to mature in their pods may be stored for winter use. Make sure they are quite dry before packing in airtight tins. Soak and use as haricots.

Nettles

Young nettles, cooked as described above are as delicious as spinach and a splendid spring tonic

Cauliflower Leaves and Stalks

When buying califlowers, always ask for the leaves as well as the flower, as the leaves make a dish by themselves if cooked as cabbage. The stalks, cooked until tender in a very little salted water and then drained, rolled in browned breadcrumbs and quickly fried in a very little hot fat or browned in the oven, have a nutty flavour and are a new dish to most people. They are also delicious greated raw in a salad.

Category: Recipes

Hay Box Cooking

Posted on by 0 comment

https://amzn.to/4868OKD

Continue reading
Category: Uncategorized